Worth 40 points total; 10 points for
each image completed
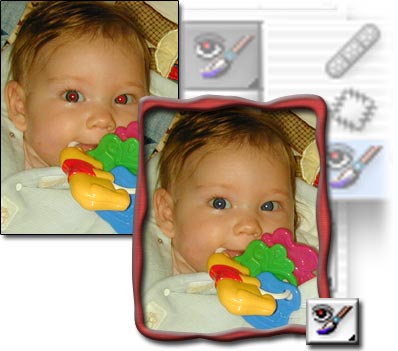
Remove red-eye in images
There's nothing more frustrating than having a
great picture ruined when a person's eyes come out bright red. Adobe
Photoshop gives you a simple way to fix red-eye using the Color
Replacement tool. In this tutorial, you'll learn how to use the tool
to fix red-eye in just a few steps.
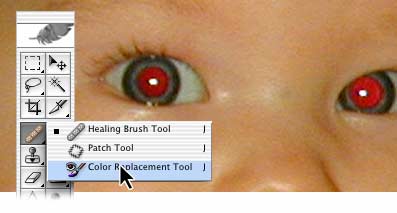
1. Open your image.
Open the image that you want to repair. There
are four red-eye images in the "Tutorial Images"
folder for you to work on. They are labeled "red-eye problem 1",
red-eye problem 2" and so on.... Try
zooming in so you can easily see the red eyes that need to be fixed.
Then, select the Color Replacement tool (located in the toolbox with
the Healing Brush and Patch tool).
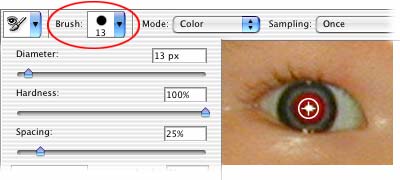
2. Choose a brush tip.
Choose a brush tip from the options bar. The
brush tip should be smaller than the red area of the eye to make
correcting the red-eye easier.
3. Set options for the Color Replacement tool.
In the options bar, you can choose settings
that help you fix red-eye. For Mode, make sure that Color is
selected. For the Sampling option, choose Once to erase only areas
containing the color that you target. For the Limits option, select
Discontiguous to replace the sampled color wherever it occurs under
the brush. Drag the Tolerance slider to a low value (around 30
percent) to replace only the few colors very similar to the pixels
you click.
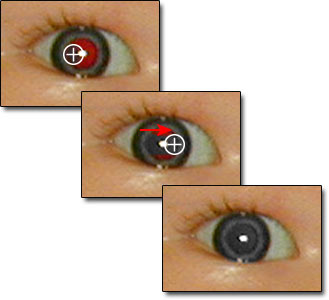
4. Choose a color to replace the red.
Typically, black is a good choice, but you
could try other colors to more closely resemble a person's eye
color. To choose a color, click the foreground color swatch in the
toolbox. In the color picker, choose a color that looks good, and
then click OK.
5. Repair your photo.
Click once on the color you want to replace in
the image. Drag over the red with black to repair the image. If all
the red isn't removed, try increasing the Tolerance level in the
options bar to correct more shades of red.
Once you're happy with the correction, save
your image. Red-eye will never present a problem again!
IMPORTANT: Save your work in the Johnson Digital folder under
"Finished Projects" and in the file marked "Image Corrections". Make sure
you name your file with YOUR NAME, so I will know who has done this project and
can assign the correct grade.
|