|
With the following technique you will fix the
perspective of an image. When photographs are taken at an angle, their
perspective can be distorted. This technique restores the perspective in a
few simple steps.
HOW TO
FIX THE PERSPECTIVE OF AN IMAGE
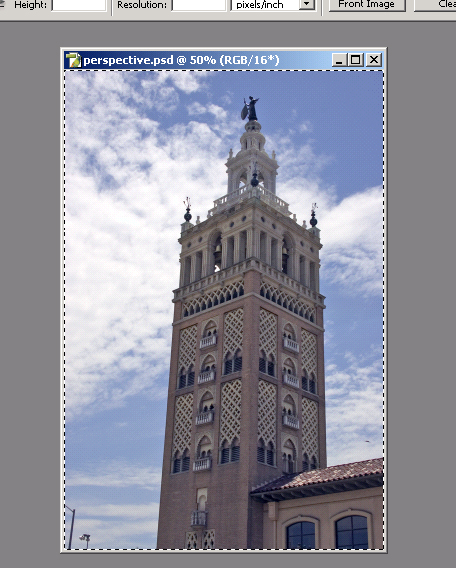
- First open the image file
perspective.psd found in the
Computer Art 2005 class folder, and open the tutorial images file. It
should be in there.
- Now drag the image box out so that you can see the
bounding workspace (called the pasteboard) surrounding the image, as
shown below at the left. Click on the Select menu and choose All. Go
to the Edit menu, select the Transform submenu, then click on Distort.
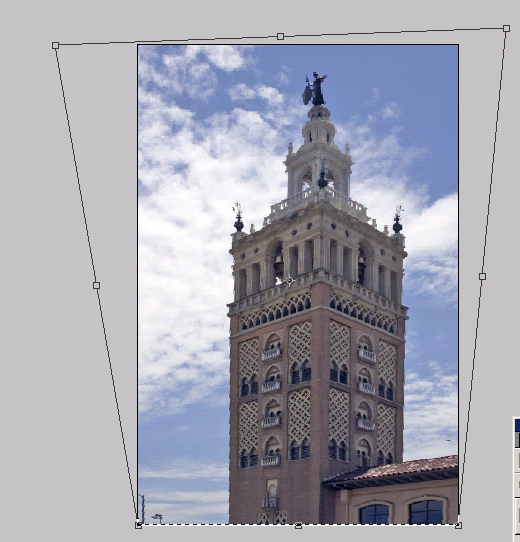
- Now click on the upper left-hand anchor point and
start to drag the image into the gray workspace as shown below middle.
(as shown above in the right side image.) Repeat the process with the
upper right-hand anchor point. When you feel you have corrected the
perspective, release the mouse button, then press the enter key.
- Be sure to save your work in the file folder
marked "Perspective" inside the Finished Work folder that is in
the Computer Art 2005 file. (Don't forget to put your name on the
file.)
HANDY TIP: To change the
color of the pasteboard (if you get sick and tired of the plain old
default grey color), select a color from the Paint Bucket tool and then
Shift-click on the pasteboard.
|
PERSPECTIVE CROPPING
You can also use the Cropping tool to fix the
perspective in an image. This method is called perspective cropping.
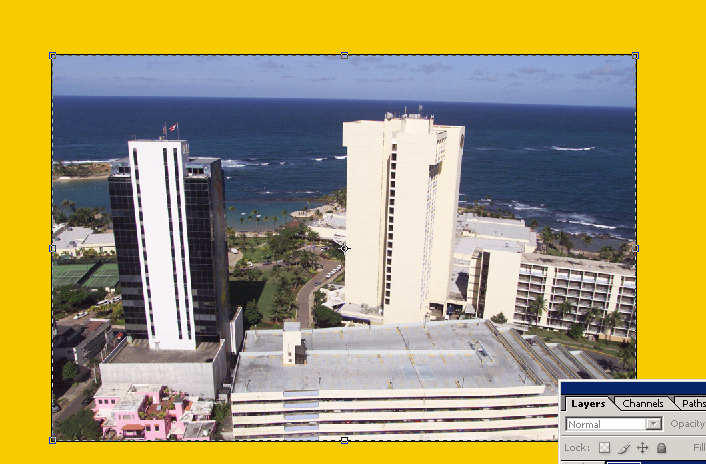
- First open the image file called
hotel.tif found in the Computer
Art 2005 class folder, and open the tutorial images file.
- Now drag the image box out so that you can see the
pasteboard, as shown below.
- Now go to the toolbox and select the Crop tool.
Select the entire image, as shown below.
- Now, in the Options bar, make sure that
Perspective is selected. Click on the upper left-hand Crop icon and
drag it to the right, dragging into the image and matching the angle
with the angle of the side of the tower.
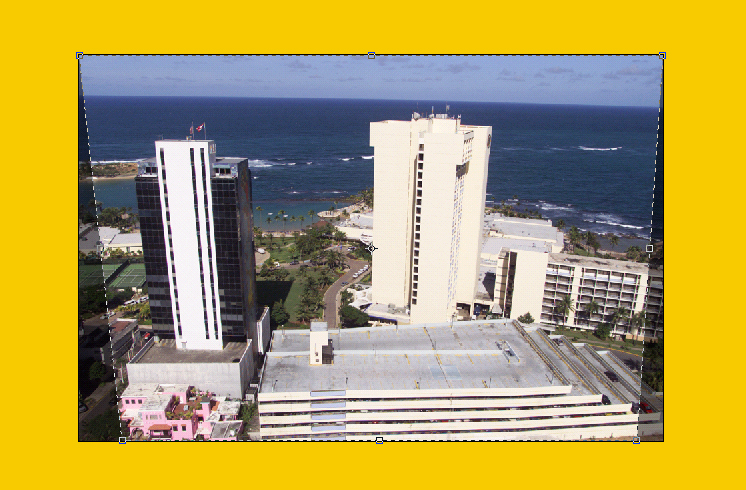
- Repeat the process on the right-side of the image,
matching the angle with the angle of the building.
- Now press ENTER. The perspective of the image
should now be fixed.
- Be sure to save your work in the file folder
marked "Perspective Cropping " inside the Finished Work folder that is
in the Computer Art 2005 file. (Don't forget to put your name on
the file.)
|